
No phone pics today I promise
I belong to a little quilty group.
We thought it would be fun to do a Round Robin quilt.
It goes like this...
You make an 18" quilt square.
You give it to a friend she puts a border on it.
She gives it to another friend on the list who adds another border.
So on and so forth.
We got together the other day to say goodbye to a friend who is moving.
It was sad and tragic because New York is a long way
away from Utah, and Maggie is fabulous.
Anyway at this little shindig we were all discussing our squares,
because the swap begins next month.
My friend April wants to use the Ghastlies.
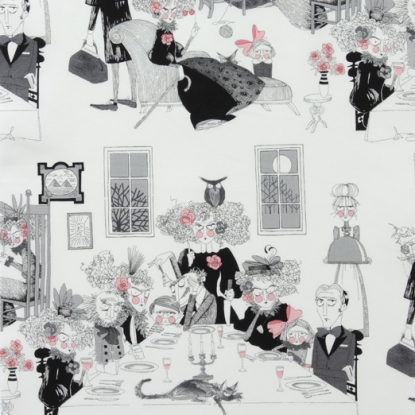
Aren't they cute?
She wanted to make a frame around it,
but couldn't figure out how.
I told her that she should do a Madeira applique.
She had never heard about this type of applique.
I told her I would find a tutorial for it, the problem is
I could not.
I found an old episode of Martha Pullen,
she gave a teaser and then wanted you to subscribe for $99
Sorry love you Martha but that is not happening.
So I told her I would do it for her so here you go April
your Madeira applique tutorial.
Since she is using Alexander Henry, I pulled out some of my old scraps.
And since she is wanting to make a frame.
I thought I would frame his cute face.

Hey good looking, how you doin'.

I first made a "frame"
I folded a piece of paper into fourths.
Drew a corner that looked good.

folded it back up and cut it out.

Looks like a good frame to me.

I got my square I am using for the frame and folded it in half.

Traced my frame shape on to it with a pencil.

Here is the secret ingredient.
Disappearing thread, you get it wet and it disappears.
I think I found mine at Joann's.
I've had it for years, I mean really how many times do you want
what you sew to disappear?
I remember thinking it was easier to find than I thought it would be.
Anyway back to business.

With your magic thread in the bobbin, and the top sew on your line.
Just a little FYI, you either want to mark your bobbin or strip it when you are done.
You really don't want to start a project with that thread in your bobbin.

There you go all done.

Next trim away a seam allowance.
Turn it inside out, I did clip the corners for turning
it's just hard to see.

Press

Soak it, press again.

Just like magic it will fall open.
I tried pressing it again at this point,
but it lost it's shape a little.
Maybe wait until it is sewn down.

Sewing it down couldn't be easier.
Your raw edge is already turned in for you.
Just place it where you want it and sew it down.
You can do it by hand but with the clipped corners I would
do it by machine.
I changed my needle position over a little close to the edge
just to be sure about the clipped corners.

Nice tiny stitch and all done.
This is an awesome technique to know for sewing dresses.
You can do scalloped hems, and a little scallop along the edge of a sleeve.
With heirloom you can use a wing needle and a star stitch to have little pin holes along the border.
Super cute.
Let me know if this helped,
and if you have any questions let me know how I can help.
Go forth and be AWESOME!
No comments:
Post a Comment