
Over a month ago I guest posted over at Sew Bitter Sweet Designs.
I was glad to help out Melisa in her time of need.
She asked for volunteers, and I volunteered.
I had been meaning to put together a tutorial for my new stitching bag.
I thought I could do that for her.

Then I started thinking about it when I saw that someone had pinned it.
It is so exciting when you are on the everything board minding your own business
and see something you made (and it is not even your sister who pinned it).
This is what I started thinking...
Melisa was getting traffic for my bag.
I am glad to help but did I just give away my stuff?
What if everyone started pinning my bag,
and then everyone started making my bag.
And the whole time Melisa is getting the credit.
I realize that that is probably not going to happen.
I am new to this whole blogging thing and didn't know,
is it OK to recycle when guest posting?
Did I do the right thing, in doing it the way I did?
I don't know.
I thought about it a while and decided to just go ahead and re-post it here.
I worked hard on it, and it took awhile.
I should get something from it right?

If you want to "pin" it, I did take new pictures,
You could totally "pin" the new picture it is pretty cute.
I mean look at how much it can hold.
And the lined drawstring parts, adorable.
Also you can't go wrong with a little Happy Zombie in your life.
Speaking of which and this is no lie, while I was making this bag I was watching.
Zombieland, it was on TV and how could I not.
Cardio!!!

I was glad to help out Melisa in her time of need.
She asked for volunteers, and I volunteered.
I had been meaning to put together a tutorial for my new stitching bag.
I thought I could do that for her.

Then I started thinking about it when I saw that someone had pinned it.
It is so exciting when you are on the everything board minding your own business
and see something you made (and it is not even your sister who pinned it).
This is what I started thinking...
Melisa was getting traffic for my bag.
I am glad to help but did I just give away my stuff?
What if everyone started pinning my bag,
and then everyone started making my bag.
And the whole time Melisa is getting the credit.
I realize that that is probably not going to happen.
I am new to this whole blogging thing and didn't know,
is it OK to recycle when guest posting?
Did I do the right thing, in doing it the way I did?
I don't know.
I thought about it a while and decided to just go ahead and re-post it here.
I worked hard on it, and it took awhile.
I should get something from it right?

If you want to "pin" it, I did take new pictures,
You could totally "pin" the new picture it is pretty cute.
I mean look at how much it can hold.
And the lined drawstring parts, adorable.
Also you can't go wrong with a little Happy Zombie in your life.
Speaking of which and this is no lie, while I was making this bag I was watching.
Zombieland, it was on TV and how could I not.
Cardio!!!

So now that I have gone on far to long,
here you go all the instruction on how to make one for yourself.
Please feel free to pin it and share with your friends.
And just because it is nice, to be nice, to the nice.
Don't leave me any sassy comments like the lady did when I was guest hosting.
I would really appreciate it.
I would like to think that I am tough but I am not.
Robyn's Patchy Stitching Bag
There is always some stitching project following me around.
I used to take it with me in a Ziploc bag, not cute.
Then I used a bag that my daughter's doll came in.
Still not cute.
Now I have this super cute patchey bag.

I am going to give you a for warning, there are a lot of pictures,
but I don't want you to get lost along the way.
Also I was making two bags at the same time so some of the pictures don't match up
Are you ready? Here we go.
You will need.
Bag 56 - 2 1/2" squares.
Lining (2) 10 1/2" x 12 1/2"
Brim (4) 2 1/2" x 12 1/2"
Handles (4) 2 1/4" x 12"
Drawstring closer (4) 8 1/2" x 12 1/2"
Interfacing
Interfacing
Start with your 2 1/2" squares.
I was lucky enough to get these super cute Happy Zombie ones.

2 1/2" square

Sew them together, I chained them, and then sewed the two together,
and so on until you have something like this.

Four rows of six and one row of four.
Then sew them together.

Do it twice, so that you have a front and a back.
Then sew them together.

Iron what will be your bottom seam open.

Next iron it on to some interfacing.
You can use what ever is your favorite.
Fusible fleece is nice and soft.
I would like to take a minute to talk about what I used.

My sister gave this to me.
You can only get it at Joann's in the sewing center.
If you sew bags you know that the best thing to use is fusible fleece.
If you use fusible fleece then you know that it is $7.00 a yard.
This is a little lighter weight then the fusible fleece but is only...
brace your self...
.99 cents a yard.
You can buy a whole bolt for $10.00 the same price as 1 1/2 yards of the fleece stuff.
Your welcome.
Moving on...
Sew your lining pieces together
then press that bottom seam (12 1/2") open.

Iron your lining, brim, and handle pieces to the interfacing.

All of your prep work is done, now is a good time to take a break.
I am going to pick up my daughter from preschool I will be right back.

OK I 'm back,
trim all of your pieces from the interfacing.
Let's sew the whole thing together shall we.

Sew down the sides.

Press the seam open.

Now you have this funny little chunk missing, this is how we are going to fix it.

Line up the bottom seam with the side seam,
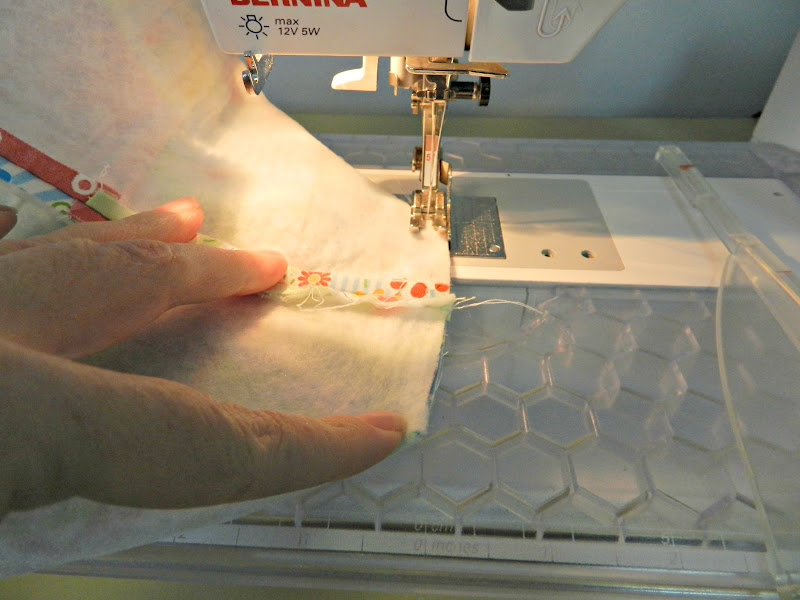
sew it together keeping the seams together.

Turn it inside out and voila a square bottom bag.
Shall we do the lining next, lets go.

Sew the side seams

Line up the side seam with the bottom seam pin (on the other side)

Measure four inches across, like this.

Mark it with a line.

Sew on the line.
Now if you want you can trim off the excess, I didn't.

Fold the extra toward the center, and put inside the bag,
lining up the side seams.

Baste together.
You are doing great, we are half way.
Now we are going to do the handles and the brim.
Ready or not here we go.

This is a trick I learned and when I first saw it I was like
"How did I not know this!"
Maybe you will be the same, or you will think I am a dork for not knowing.
Anyway put in a safety pin like this with the head pointed in.
Sew down either side.

Start pushing the pin through.

Look at that totally turned inside out.
Awesome!!

Topstitch on both sides.
I like to use my open toe foot for this, it is a nice guide.

For the brim sew all the sides together.

Make a mark four inches from the side, on both sides.
Yes I do do this with a razor blade.
Be careful not to go beyond your seam allowance.

See look at that nice little mark.
Center your handle on the mark, pin in place.

Sew the top closed.

Turn inside out and topstitch the edge, again with the open toe foot.

Look how cute it is.

Now with right sides together, place it on the bag.
Almost done now we just need to make the drawstring closer.

Layer all your drawstring pieces together and on the 8 1/2" side
make a mark that is 1 1/2" down from the top.

Cute little mark, that is where we are going to start sewing.

Sew your side seam.

Press this seam open, if you hold the unsewn ends just right
They will lay open and let you press them down.

Topstitch down either side of the seam.
Once again using the open toe foot, start where the seam is split open.

Do both sides of both the front and the lining.

With right sides together, sew the two pieces together.

Turn inside out and topstitch around the top.

Beginning at the point where the slit stops,
topstitch around the top again, making a casing.
We are almost done I promise.

Now we are going to make a sandwich.
Like this bag, brim, and the drawstring top.
Make sure you have the right sides together.

Sew around the top keeping shy of the basting stitches.

All sewn together.

Trim off the excess seam allowance.

Pull up on the draw string part..

and tuck it inside the bag.

Lift up on the brim....

and topstitch with your quilting foot around the bag
make sure to keep it all taut, pull out on the brim and pull back
on the drawstring part as you feed it through.

Look how nice that finishes, the outside...

the inside.

The very last step.
Thread ribbon through the casing on one side...

and then on the other side.
Tie a knot in the ends and burn the edges so that they won't fray.

Pull them tight and,
You
Are
DONE!!!

I knew we could do it.
I hope you like it and I can't wait to see if you make one.


